As of February 1, 2016 Microsoft has moved the currently free upgrade to Windows 10 for Windows 7 and Windows 8.1 users from an optional upgrade to a recommended upgrade. When I build a system I by default set Windows update NOT to install recommended updates, only critical updates. This is because I feel that the less updates done without user knowledge may lead to the installation of unnecessary updates aka a language pack etc that you have no use for.
There have been posts on some forums saying that this would allow Microsoft to automatically upgrade your Windows 7/8.1 to Windows 10 without the enduser doing anything. I wanted to see if this indeed was the case. I placed a newly installed and activated copy of Windows7 Home with all 220+ updates including recommended ones on a dual Xeon computer.
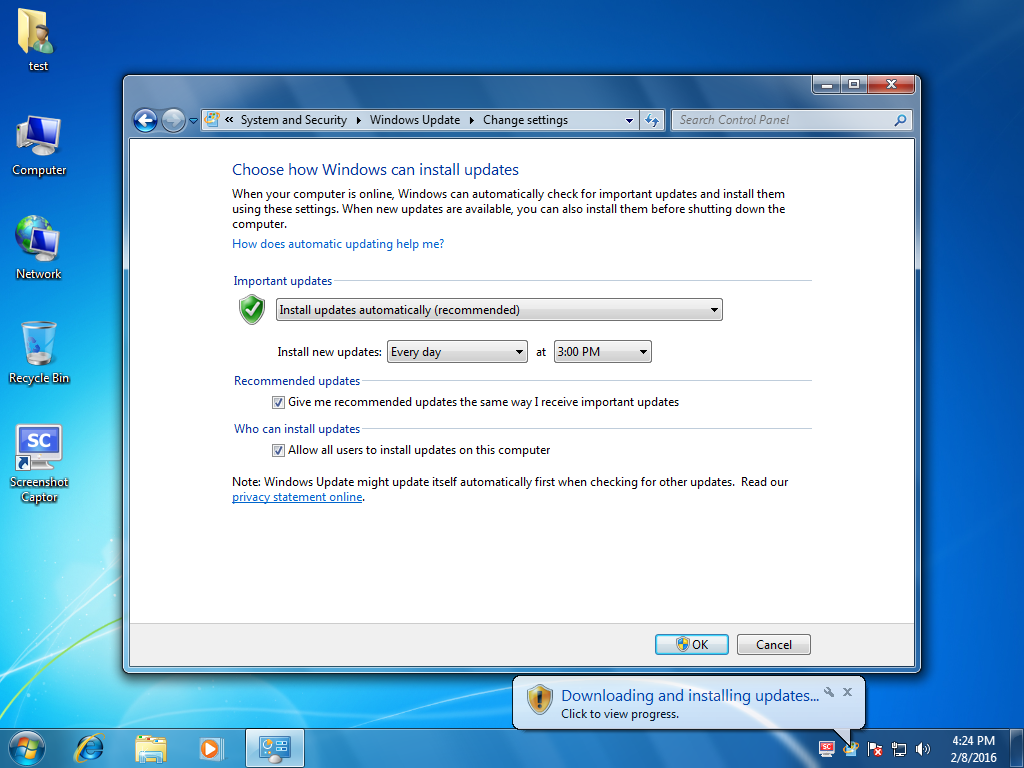
Windows update including recommended one ready to be installed on a new Windows7 Home install.
I left the computer running for over a week. During that week I did frequent Windows update checks in addition to having Windows updates set to automatic mode. The computer did have several pop up windows on start up trying to get one to upgrade to Windows 10:
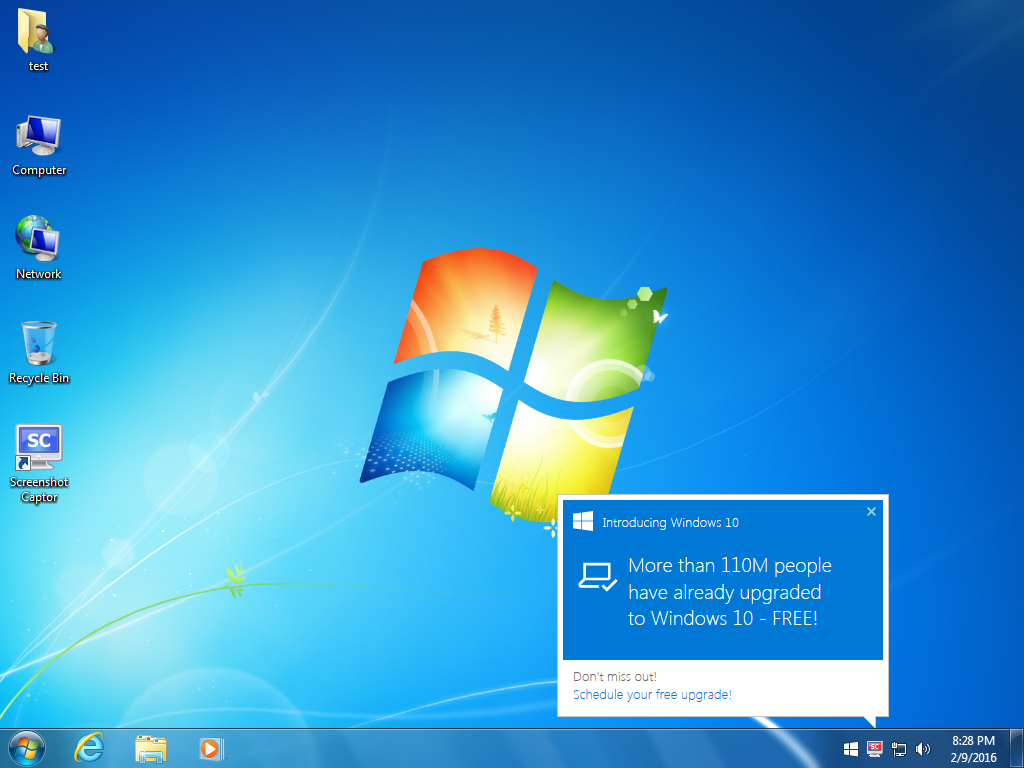
One of the Windows 10 upgrade pop ups seen on bootup.
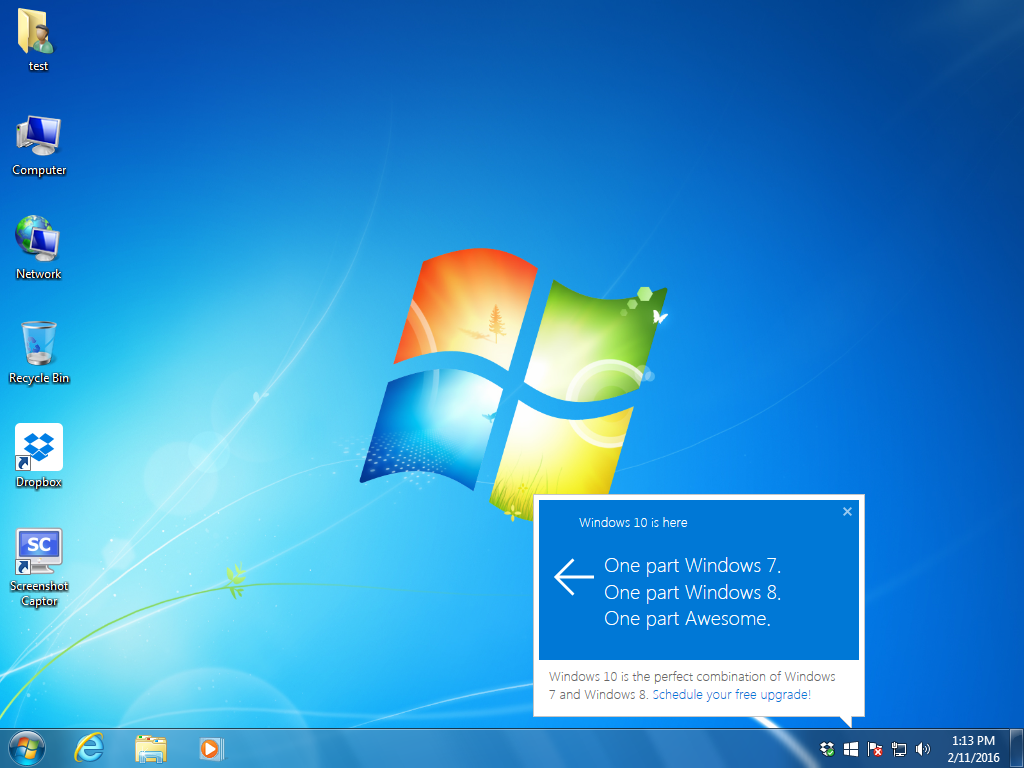
Another Windows 10 upgrade pop up window
Besides the above popup windows when you clicked on the white windows flag/logo in the system tray you are presented with the following screen:
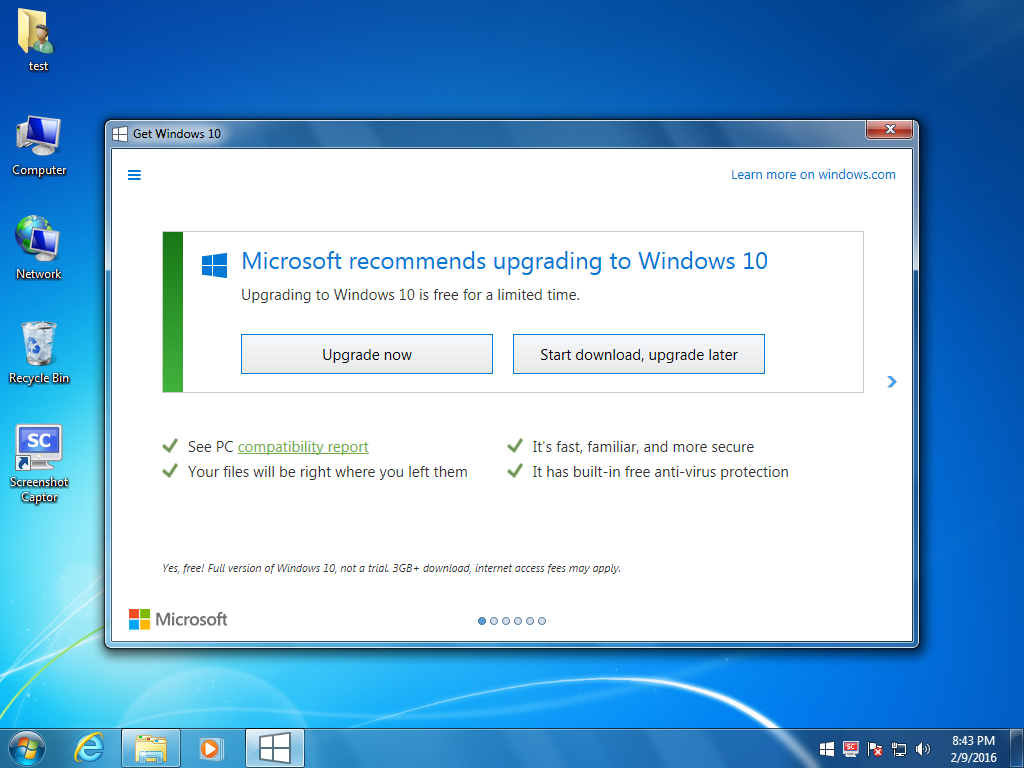
Result of clicking on white icon icon in system tray
If you clicked on the Start Download, upgrade later on the above screen you see the following download progress screen as the upgrade files are being downloaded:
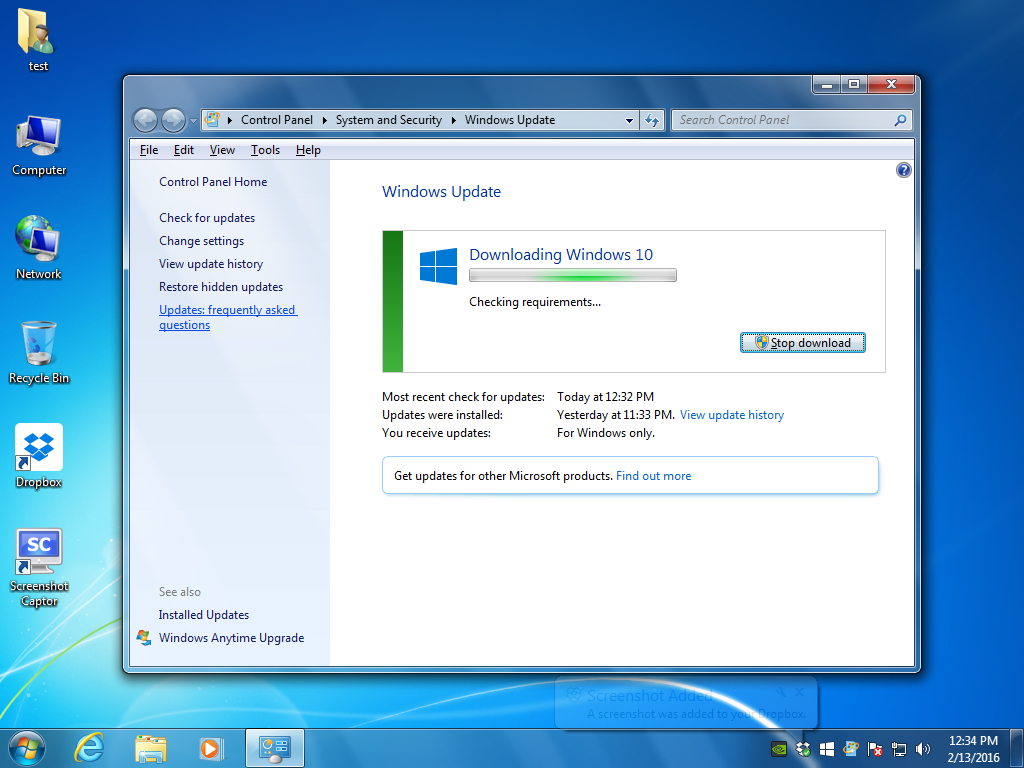
Windows 10 upgrade files being downloaded prior to installation
Once the files are downloaded and ready for the upgrade process you have to agree to the Windows 10 Software License Terms. If you click on Decline button the upgrade terminates without doing anything further.
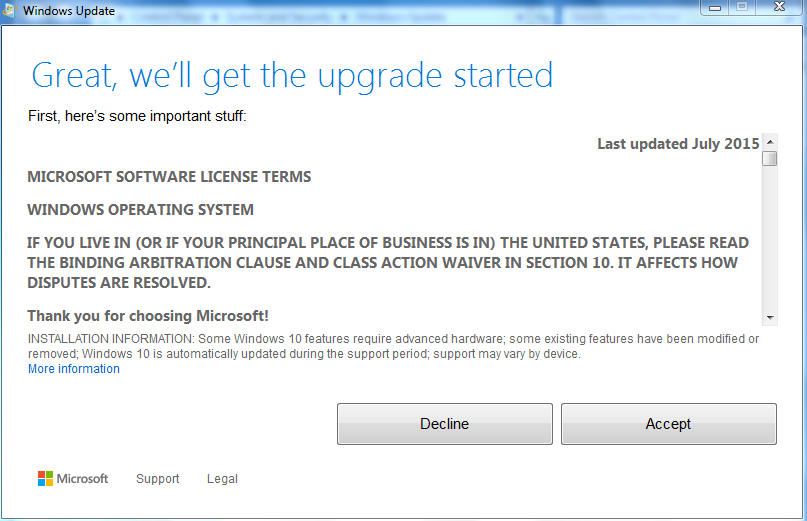
Windows 10 Software License Terms
If you do accept the Windows 10 License Terms you can either upgrade right away or defer the the upgrade until later. If you select the latter you are presented the following screen from which you can schedule a time for the upgrade to begin:

If you want to delay the upgrade until later you see this screen to pick when you want upgrade to occur.
If you have selected a future date and time to being the upgrade a count down time will start and when the timer expires the upgrade process will begin after which you will be told to reboot your computer to complete the process. If you see this screen and you do not want to proceed with the upgrade for whatever reason there are two options open to you. You can either reboot the computer allow the upgrade to continue and once Windows 10 is installed use the Windows 10 rollback option within the first 30 days after Windows 10 is installed to allow you to revert back to your prior version of Windows. To see the steps involved see this page . The other option if you see this page and want to stop the process is to use a free utility such as the GWX Control Panel available here and use its Delete Windows 10 Download Folders option to remove the downloaded upgrade files. For more detailed instructions regarding the GWX Control Panel see this page. This app can also allow you to kill the upgrade process when you see the upgrade countdown timer from the above screen.
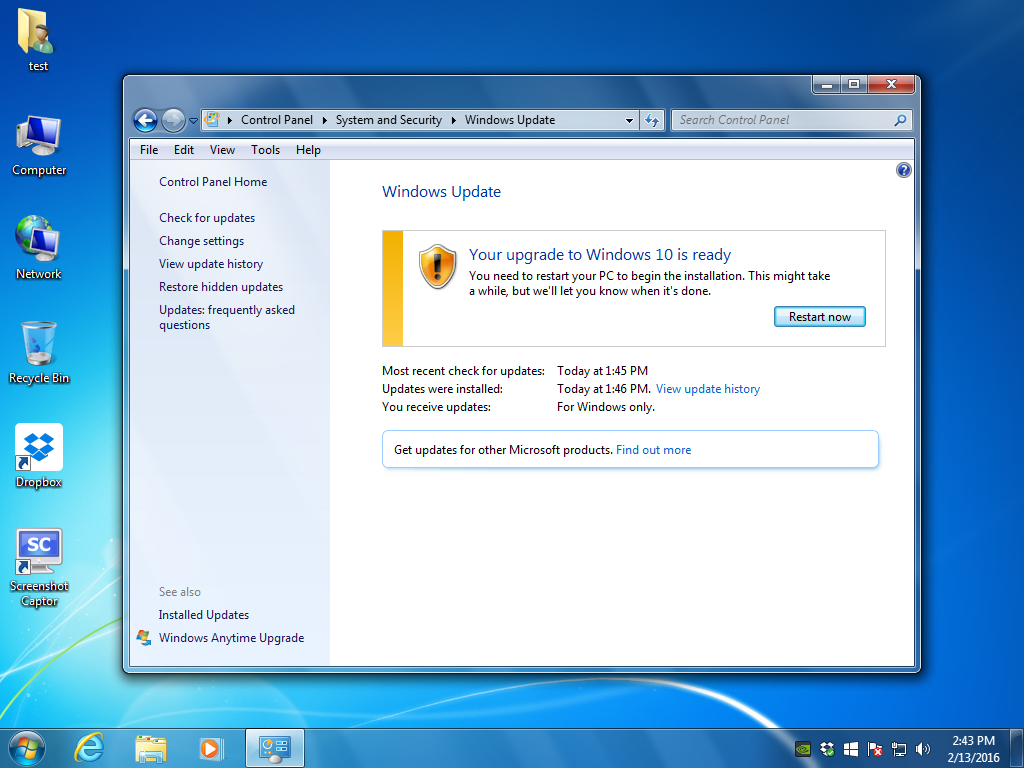
When the upgrade timer counts down and the installation is ready your computer has to be rebooted.
Once you reboot the upgrade to Windows 10 will commence and eventually your Windows 7 / 8.1 installation will be upgraded to the corresponding version of Windows 10.
As far as I can tell Windows 10 upgrade process at least in this test case did not proceed until intervention by the end user started the process off by telling it to download the files. This is similar to the Reserve You Copy of Windows 10 that was presented on earlier versions of the Windows 10 upgrade icon. There are several points where one can abort the upgrade process. This includes rejecting the License Terms for Windows 10 or by downloading and running GWX Control Panel either when you see the countdown timer counting down to when to start the upgrade process or once the upgrade process has started but still waiting for you to reboot the computer to complete the upgrade.